Do you love Forest?
Imagine having your own bonsai forest at your place!
Don’t know how to form a bonsai forest?
Well, in this article I will tell you how to create your own bonsai forest in an easy as well as practical way.
What Is a Bonsai Forest?
The bonsai forest simply means many bonsai plants planted in a single container. This technique usually contains multiple bonsai trees of a single variety but you can also make bonsai forests with several different varieties.
Using different types of plants requires a more complex approach as plants have different requirements. So it is best to combine the plants that have similar needs in order to grow your bonsai forest successfully.
Looking to buy a flowering bonsai plant online? There are many reputable online retailers that offer a wide selection of species and styles, from Azalea to Jasmine to Wisteria. Be sure to research the specific care requirements of your chosen plant and ensure that you have the appropriate environment and resources to care for it properly. A beautiful and healthy flowering bonsai plant can be a wonderful addition to any home or office space.
When more species are planted in a container, the trickier it becomes to create the bonsai forest.
Sometimes species reproduce from a lone underground root, thus the trunk looks and grows a lot like limbs above the ground. This technique is called the Kabudachi technique.
Usually, trees endure blustery weather and rainwater. Rain makes the soil softer which encourages roots to develop close to the surface where the soil has little underground holes. All of these factors work together to weaken the tree’s capacity to stand against the wind speed.
However, plants are highly capable of staying alive even when the circumstances are against them. Just as nature demands a tree to adapt, the bonsai artist tries to show the natural world with outcomes that are as attractive as the full-sized examples created by nature.
Another style of bonsai forest is the “ikadabuki” which means a straight line, here the trunk is completely out of the earth. This classic style allows it to rest on the surface although a few will be able to grow to some extent Like a “Kengai” (outside range) and a little higher than the soil.
Another sub-technique allows the trunk to rest partly underground at a slant, allowing for the bark of the tree to decompose from dampness and tiny organisms in the soil.
Whereas, in many other bonsai forest styles, the trunk develops numerous twigs that are similar to individual trunks. Thus, creating the illusion of a forest style, by developing each tree from a solitary tree.
Other out of ordinary sub-types is the netsunagari (sinuous) method, where the original trunk is completely buried.
The forms and variety of bonsai forest are only limited to bonsai artist imagination. Also, this is a perfect medium for allowing individuality as broad-reaching as any natural forest formation offers a broad artistic opportunity.
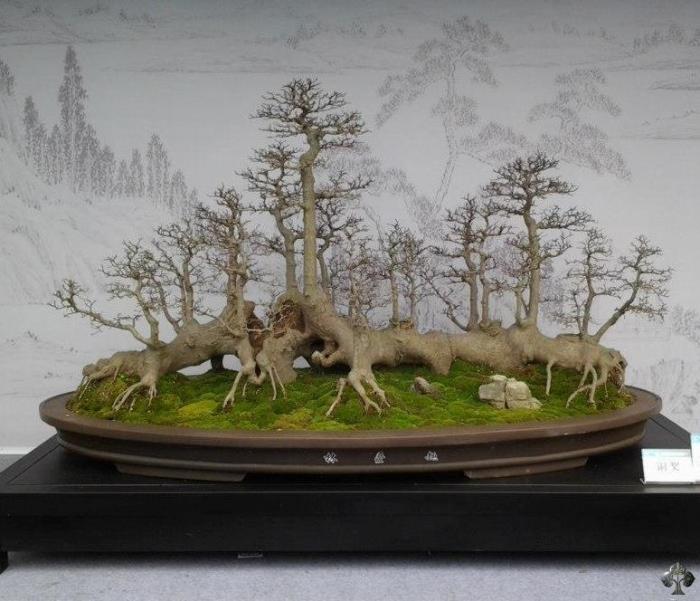
Some of the stunning examples of bonsai forest are,
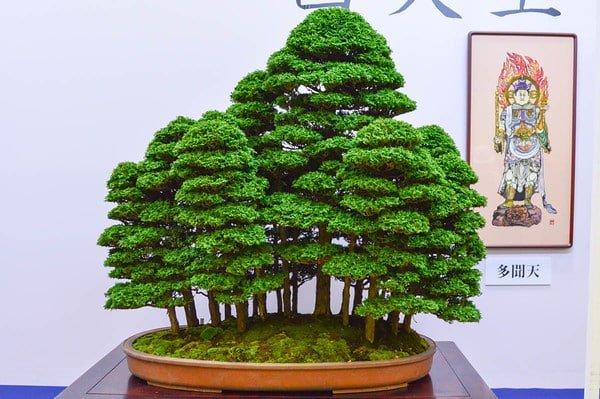
Hinoki Cypress forest
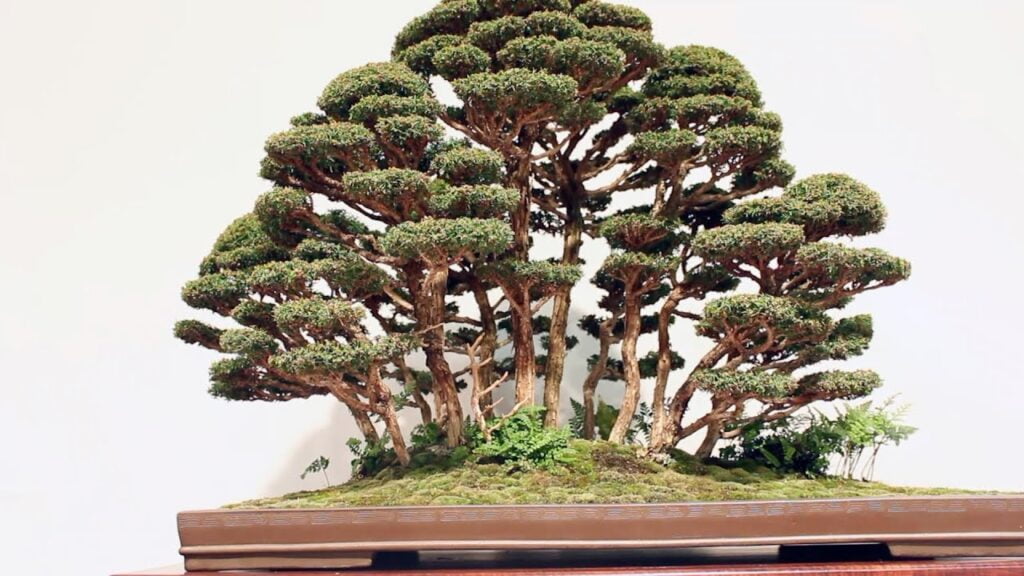
Forest Bonsai
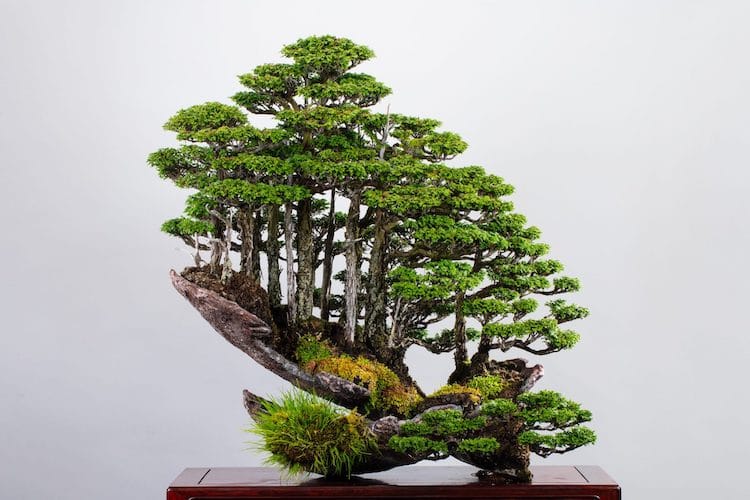
Kimura’s famous bonsai forest
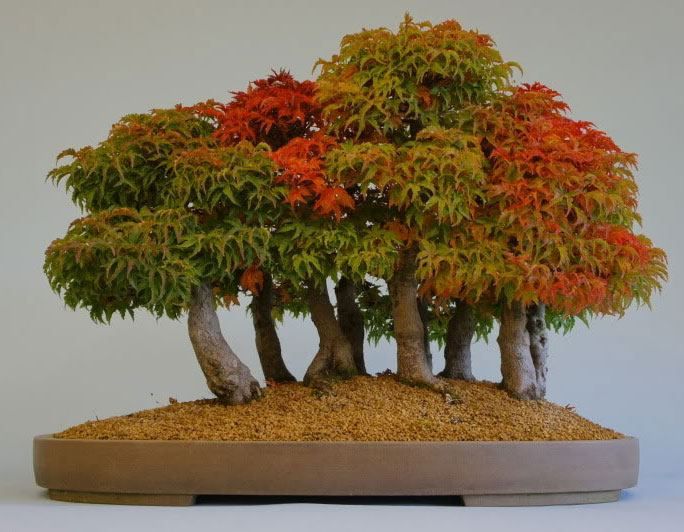
Maple Bonsai Forest
Buxifolio Bonsai forest
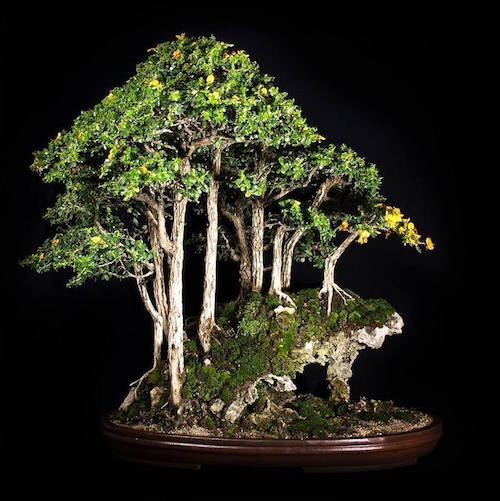
Chinese penjing
When is the best time to plant a bonsai forest?
The spring season is the best time to create the group planting, the ideal time is when your trees are showing the signs of new growth.
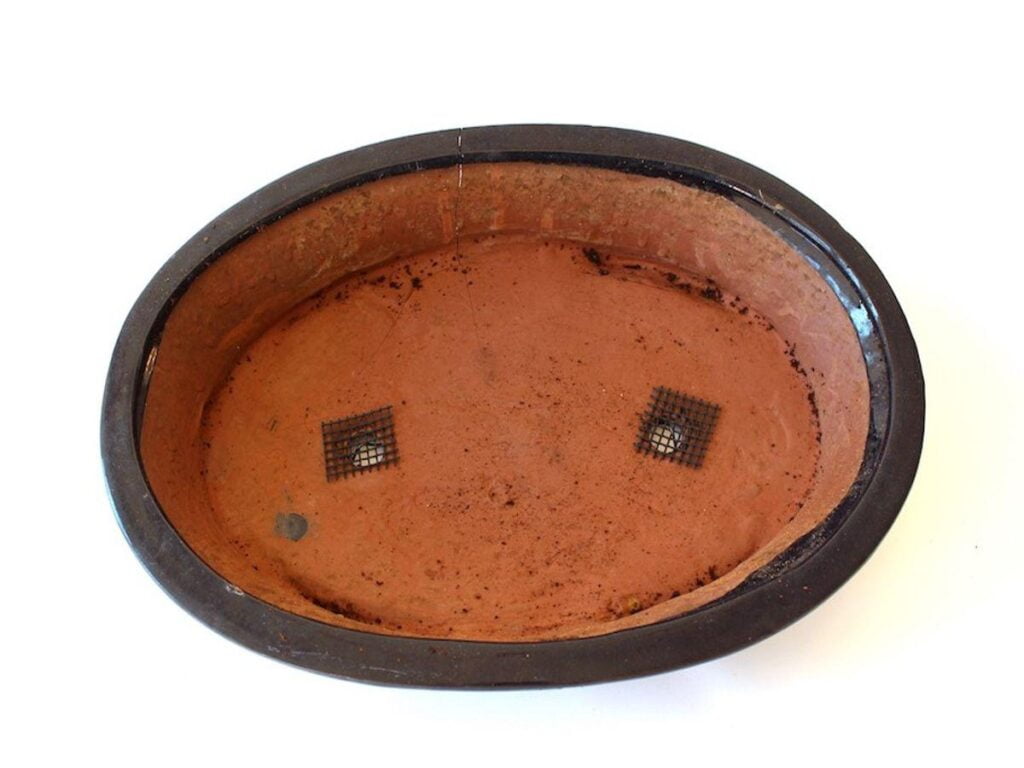
Things you will need to make bonsai Forest
- Landscape pot (very wide and shallow)
- Wires
- Meshes for drainage holes
- Substrate
- Bonsai plants
- Moss to decorate
- Repotting tools ( wire cutting scissors, bamboo stick, spatula)
How to form your first bonsai forest
Step 1: Prepare the meshes for the drainage holes of the pot.
The meshes are plastic meshes cut in a square of different sizes. Their purpose is to prevent the substrate from leaking out while letting water pass through it. You need to use wire to fix the mesh to the drainage hole.
Step 2: Place a guiding wire
The purpose of these guiding wires is to anchor the different trees that will form the forest. To do so, take a thick wire of 4 or 4.5 mm and place it well along with the pot, from the two farthest holes.
On that guiding wire, tie perpendicular smaller and longer wires that will anchor the trees.
Step 3: Put the first layer of substrate in the pot
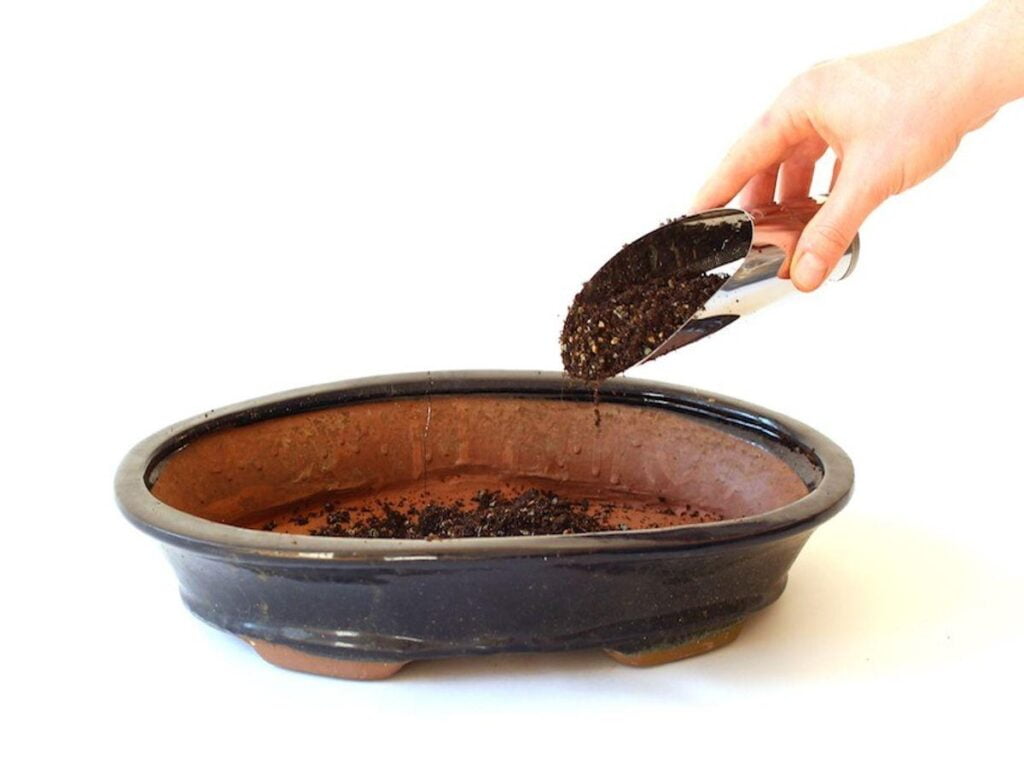
Put the first layer of substrate, just above that layer you can place a chelate (a substance that prevents metal ions from binding to form salts.)you can place charcoal or bamboo.
Usually, the function of chelate is to maintain the neutral pH of the substrate, favoring roots aeration and sustaining the formation of mycorrhizae. You can buy charcoal from the grocery stores.
Step 4: start working with the trees
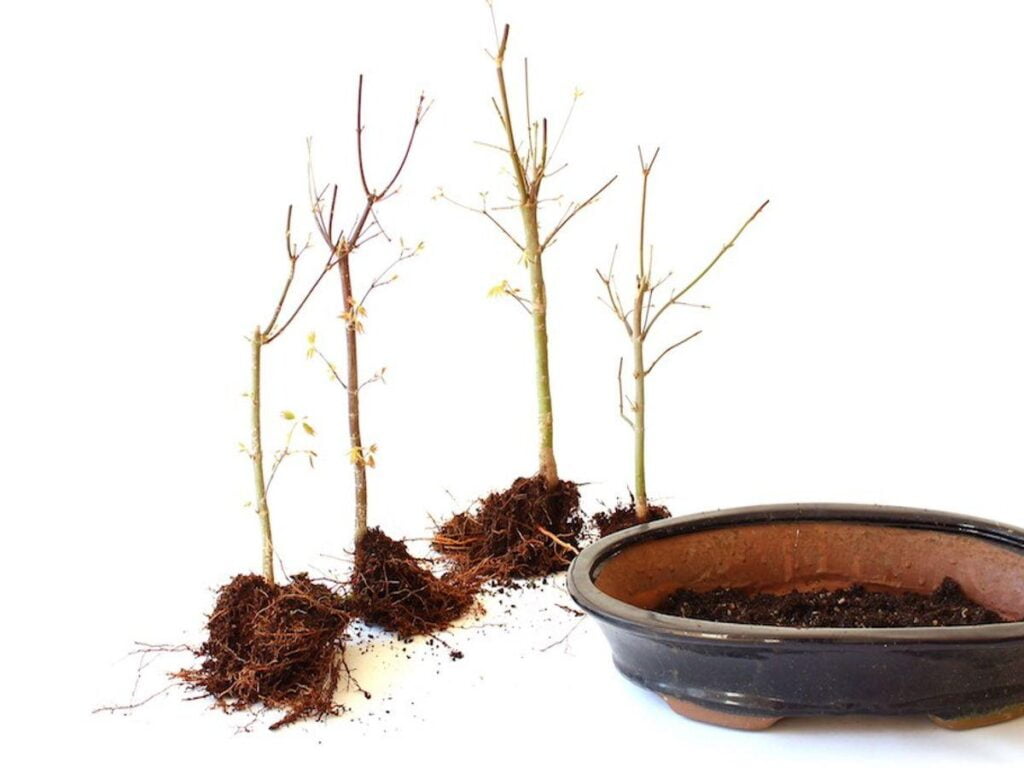
Put the main tree first. Now, clean the roots with the rake, take care not to break them. Fix the tree and wire it with perpendicular strips of aluminum wire that you had previously prepared.
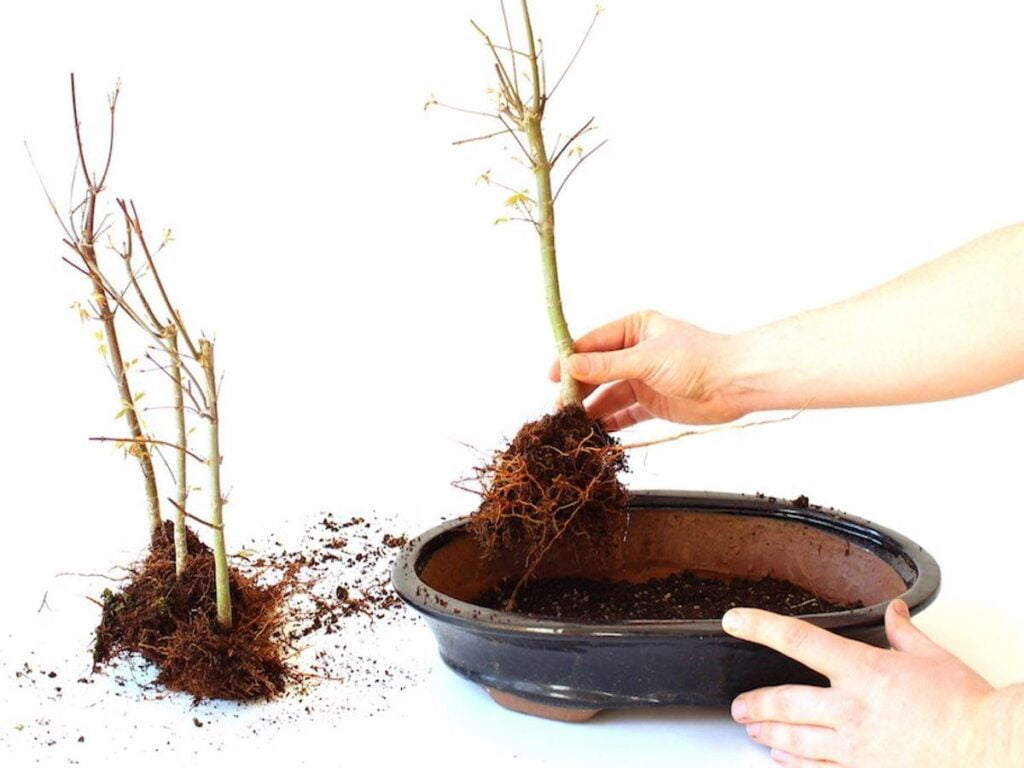
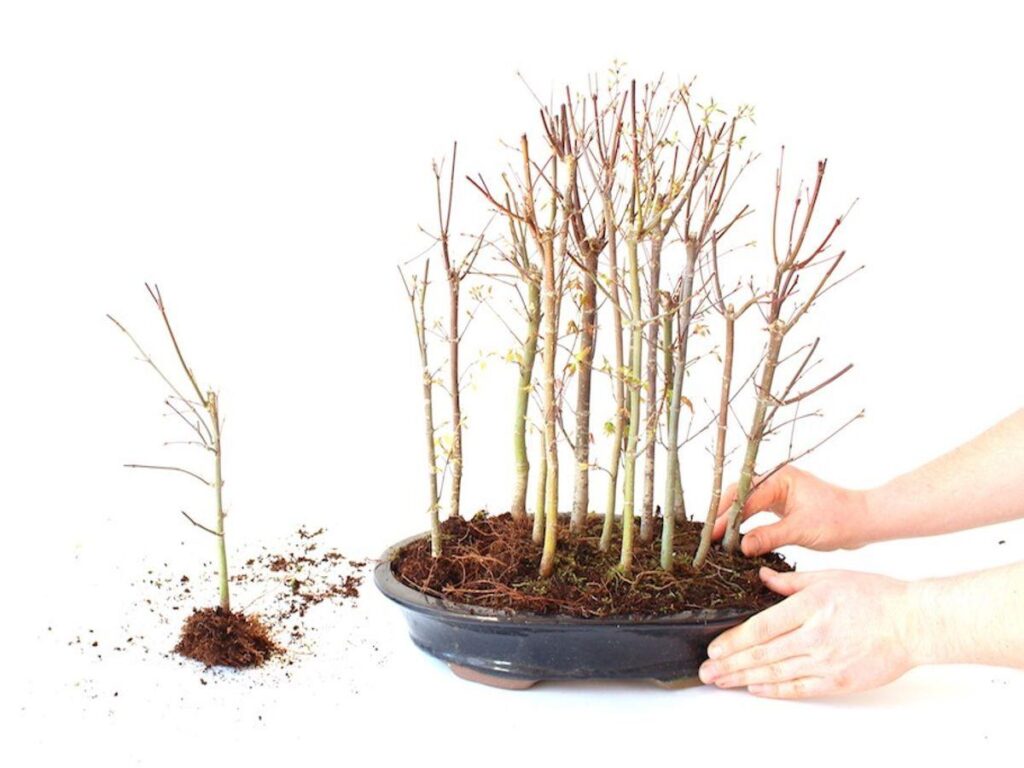
Make the main tree thickest and the tallest or the prettiest. And around that tree, locate the other trees to elaborate the design.
If it is your first bonsai forest, make it a simple design like a forest with a linear movement.
Or you can place the tree slightly to the right of the main tree or off-center. You can also place a group of 3 trees on the right and 2 on the left of the main tree. You can add more trees to your forest. In addition to that create an imaginary path between these trees.
Step 5: Arrangement of bonsai
Place the remaining trees, taking into account that the distances between them must be irregular.
Additionally, you should try not to have any tree covering another, and keep the empty spaces well defined, as in any natural forest.
Step 6: Finish adding substrate in the holes
Now, with a stick, introduce the substrate through the roots of the trees.
Step 7: Outline the silhouettes of the trees and the forest with scissors.
They have no defined silhouette since they are young bonsai. In order to make the silhouette more dynamic and irregular, you need to let the main tree grow taller than the other trees.
Step 8: Add the moss
Place the moss to decorate as well as to prevent the substrate from leaving the pot when watering. Also, moss gives a natural look to forests.
Remember not to cover the entire substrate with moss, arrange them in pieces to make it look real.
Conclusion
Your simple bonsai forest is ready. Also, you can add more creativity to your forest. These young bonsais will mature with you and you are surely going to admire the changes that time will generate in your forest.
Enjoy the magic of the forest!
Related Articles
- Parlor Palm vs Areca Palm: Differences You Should Know

- Rattlesnake Plant: How to Grow and Care
- Repotting Snake Plant: When And How To Repot A Snake Plant
- Optimal Soil for Snake Plants: Guide to the Best Growing Conditions
- Areca Palm Leaves Turning Yellow: Causes and How to Fix Yellowing Leaves
- 15 Snake Plant Benefits | Reasons To Put A Snake Plant In Your Bedroom and Home