The $5 Wi-Fi Cantenna… it’s cheap and it works!
There are a TON of external Wi-Fi antennas on the market. Directional, Omni Directional, Parabolic, Yagi and others styles. Prices range from $10.00 online to several hundreds of dollars.
I own some pretty expensive units, but nothing is more satisfying than building your own directional Wi-Fi antenna!
I have built and tried just about every “do it yourself” Wi-Fi antenna that you can find on the internet. I’ve built fancy hard to assemble antennas, not so fancy “pringles” can antennas, and even directional “yagi” style antennas. I have even modified an old TV Satellite dish with a USB Wi-Fi adapter, but out of all of these “do it yourself” antennas, my favorite can be found here: How To Build A Tin Can Waveguide WiFi Antenna by Gregory Rehm.
Gregory’s site has a form that will calculate the frequency that your new “cantenna” will operate at. I take no credit for his work, to me he is a mad genius that supplies easy to follow instructions to make a kick ass directional Wi-Fi antennas. Out of the multitude of antennas that I have built, his by far has been the most reliable. I’ve been able to pick up wireless SSID’s at up to 1 mile using a 26 ounce soup can!
Here is what you need:
1. A clean used Can…the thicker then can, the longer it will last. I prefer the thick walled 26 ounce soup cans.
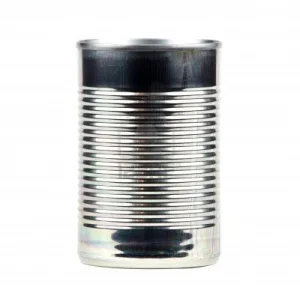 Cost = $0.00 (enjoy your soup!)
2. An “N” Connector… I prefer the type with a screw/nut connection. They have several styles on the market, but for simplicity I prefer this one.
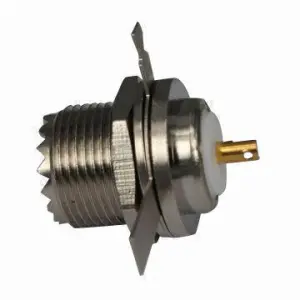 Cost = $5.00 (sometimes cheaper!)
3. A piece of Brass Rod… This is the “element” of your antenna.
 Cost = $0.00 (you can find at salvage yards or hobby shops for pennies of find for FREE!).
An assembled “element” will look like this:
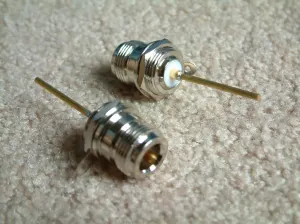 (for those of you who aren’t brave enough, you can find pre-assembled elements online)
4. A N male to RP-SMA male “pigtail” cable… Don’t cheap out on the cable, this is the most expensive part. You can make your own cable if you have the tools, but I would suggest purchasing from a reputable shop. If you use low grade cable (or coax) your antenna will not be as efficient! This cable will connect your shinny new “cantenna” to your USB wireless adapter.
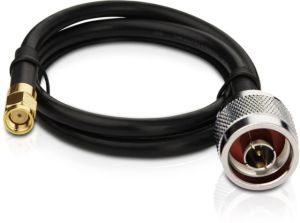 (this is an extra expense but you will thank me later!)
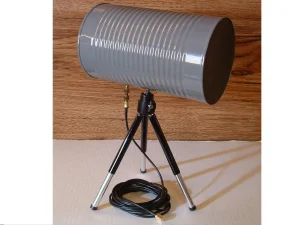
5. A tripod… This is optional, but I highly suggest putting your new “cantenna” on a tripod. Be creative! I’ve seen window mounts, table top tripods that you can purchase at the $1 store (pictured below). My personal “cantenna” is mounted on a $10 adjustable camera tripod.
 Cost = $1.00 (found at any $1 shop, Drugstore or Walmart!)
6. A small amount of time, a little solder, and something to cut your brass rod to length. THAT IS IT!
Simply add to your favorite USB Wireless Adapter and Enjoy!
As far as USB Wireless Adapters go, there are a lot of those on the market as well. The only wireless adapters that I use and recommend are by Alfa Wireless. I personally use two of their units. The AWUS036NEH 802.11n/b/g Long-Rang USB Dongle & the more powerful AWUS036NHR 802.11b/g/n Long-Rang USB Adapter. Both units are inexpensive, both have been reliable in Windows and Linux. The Alfa adapters also allow “injection” and “monitor mode” in Backtrack! And this is why I use these particular adapters. You can buy these adapters on eBay & Amazon for under $30.00.
Editors note: In some areas possession of a “cantenna” may be illegal. Use and build at your own risk. You’ve been warned!
Hi
do you think it can work as a receiver ?
Yes you can use two of them to send and receive!
Instead of the brass rod/element, can I just use the SMA antenna that was already screwed into my TP-Link 3500 n600? Basically wrap a can around that?
If not, where can we find that brass rod & n-connector thing?
THANKS!!
The brass rod can be found at any hardware store, the N connector can be purchased on eBay. The existing TPlink antenna will not give you good signal. You could however use the TPlink in place of the N connector and see how much more signal you receive!
Can you set it up to receive from a distant wifi source and then have another to transmit it to the back of an iPad ?
I have not tried that test. I’ve picked up wireless at nearly 1 mile Line of Sight, and have used these in the top of parking garages to do point to point test (with line of sight). If you try it out, let me know how it goes.