
Fixing a rope: Two knots to know
This tip was written with the help of Bryan Hall, who is certified by the Society of Professional Rope Access Technicians (SPRAT) at their highest level. Connect with Bryan at www.rosecityropes.com
Plus, high fives to Mikey Stevenson at The Rope Access and Climbing Podcast for making the nice video below that shows how to tie these two knots.

If you need to tie (aka “fix”) one end of a rope to two solid anchor points, you have many options.
Make a single master point from a sling and two carabiners, tie a bight knot, and clip the rope to it
Clove hitch to one bolt, tie a bight knot to the other bolt
You could use more exotic flavors of the bowline to make it easier to untie.
The example below are common in the rope rigging world, where strength and simplicity are guiding principles. Climbers should find these pretty easy to learn.
While it's not so common in day-to day climbing, there are some situations when you may need to fix a rope:
Big wall climbing, such as leading a pitch or two from the ground or your bivy, leaving the rope there overnight, and then ascending it the next morning to get a head start.
Needing to descend from a climb quickly, for some emergency reason (injury, lightning storm, darkness, etc.). You fix the rope, rappel the single strand, leave the rope there and (hopefully) come back and get it later.
Top rope soloing - get in lots of climbing time without boring your belayer to tears. (Note, rope soloing is an advanced skill. Please get qualified instruction before you do this.)
Some type of instruction scenario, where climbers are coming up one rope, and then rappelling down on another rope, which may be a single fixed line.
Other kinds of specialized rigging, like photography, caving or route setting.
General safety note about rope fixing: Keep the tail of the knot about 1 foot / 30 cm, no longer. The length of your forearm is a quick guideline. That's long enough to make the knot secure, but not so long that someone might make the potentially lethal mistake of rappelling off of the knot’s tail instead of the actual strand of rope. Yes, this sadly has happened. Proper length tails prevent it.
We're going to cover two methods, the bunny ears figure 8 and the Y hang. Here’s a nice video from rigging expert Mikey Stevenson at The Rope Access and Climbing Podcast showing how it's done. (The instruction on the knots starts about 2:50). Check out Mikey's YouTube channel for lots more expert rigging videos like this.
Method 1 - ”Bunny Ears” Figure 8
The bunny ears works well to secure one end of a rope to anchor points that are more or less side-by-side. This is a variation on the figure 8 on a bight, but you end up with two loops Instead of one. This one may take some practice, especially dressing the knot properly so there are minimal twists. Tip: start with making a larger bight than you think you need.
One cool thing about the bunny ears figure 8 is that the ears are adjustable. You can feed a bit of slack from one loop and pull it to the other side. This can help distribute the load more equally between two anchor points. You can do this when the knot is loose; after you snug it down, you can't adjust the ears.
Some people are concerned that the bunny ears figure 8 is not redundant, meaning if one strand were to be cut, it would pull through and the other strand would fail. This has been tested, and it doesn’t happen, so yes, the knot is redundant.
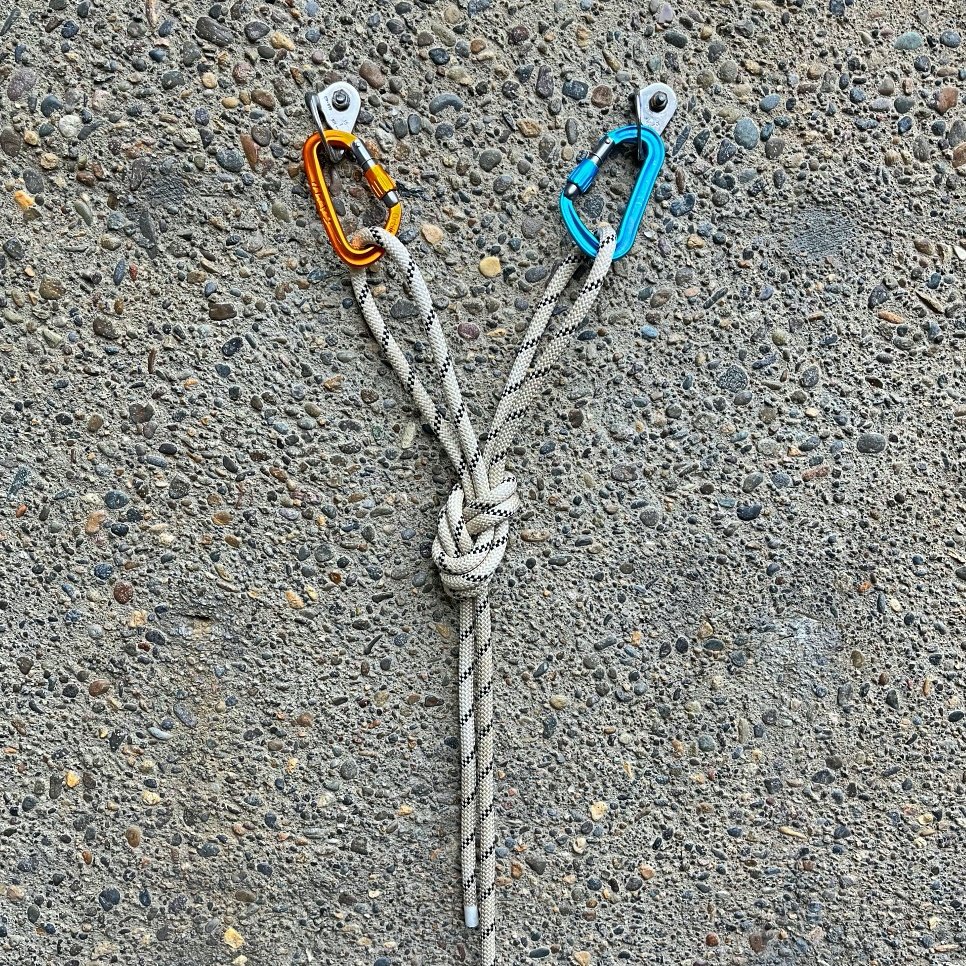
Method 2 - The “Y hang”
The Y hang can be helpful if the anchor points are vertically offset, if the load is coming from one side, or if the anchor points are side-by-side but somewhat far apart.
And, to be accurate, it's not really a single knot; it's a combination of two. That's why it's nice - it uses two knots every climber should be familiar with (as opposed to the seldom-used bunny ears figure 8.)
First, tie a figure 8 on a bight in one end of the rope. Make it tidy, with a small loop not much bigger than your hand, and a tail of about 12 inches / 30 cm. Clip it to the top anchor with a locker.
Next, tie a butterfly knot down the rope a bit. As shown in the video, the size of the loop can be adjusted by feeding rope into or away from the loop as needed. You will probably have to adjust it; tying a butterfly with the correct size loop on the first try is pretty rare.
Clip the butterfly loop to the second anchor point with a locking carabiner. When you weight the main rope, the load should be more or less equally distributed between the two anchors. (In the photo below it looks like there's a bit of slack going to the top anchor, but when the rope is weighted, the load is distributed pretty well.)
“Would a directional figure 8 could work here instead of a butterfly?” The answer is yes, but as far as I know it doesn't really offer any advantages. Australian rigging expert Rich Delaney said something to the effect of “a butterfly knot does everything a directional figure 8 can do”, and I tend to agree with him. IMHO, if you can tie a butterfly, there's not really a need for a directional figure 8 in recreational climbing.
