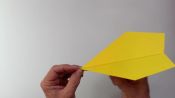
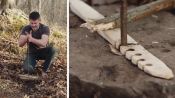
Learn to Fold the World's Best Paper Airplane
Released on 11/09/2020
[upbeat music]
What we're about to do here is very nearly impossible.
[laughing]
We're gonna make the best paper airplane in the world,
and we need a lot of tools to do that,
way more than you would ever think you'd ever need
to make a paper airplane.
So let's go through the list here.
You're gonna need a roll of tape that's 25 millimeters wide,
and you're gonna cut off a 30 millimeter chunk.
And I have a handy-dandy little gauge here
that I've made for just that purpose.
It's 30 millimeters from this edge to this line right here.
And I just have a little tab I can hang on to it
when I'm cutting the tape.
So, tape, that's 25 millimeters wide.
You're gonna make yourself a little gauge
to measure 30 millimeters
so you don't have to use this clunky thing, a ruler.
You need a pair of scissors.
You need a protractor.
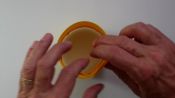
You need a snack clip.
The defining part of the snack clipper [laughs]
it's just like popped apart, snack clip popped apart.
It's never done that before.
And we can get the jaws of death back together here.
Is it gonna live? [laughs]
Wow, okay.
So, this clip ends up being not rescuable.
It was broken.
This little guy right here that holds the spring in
or holds the other part of it in, it's gone.
[clip clattering]
Gone.
Okay. So we had to go to a backup clips situation.
They did not have a padded clip at my local market,
so I had to put some padding on it.
This is a snack clip with a sharp plastic edge.
And I put some electrical tape,
about three layers of electrical tape on there
to make it soft on the paper.
So that's gonna be important later.
So, we've got the tape, we've got a measuring thing here.
Sharp pair of scissors,
really sharp pair of scissors, really necessary.
Protractor to measure these two angles here.
You want 155 on one side of a piece of cardboard,
165 on another.
You don't have to use the same piece of cardboard,
you could have two chunks, but I thought,
Hey, as long as you got a chunk
you might as well just use both sides of it.
The other thing you'll need is...
Oh, look, there's the plastic piece that fell off that clip.
You'll need an exacto blade.
And I use that to transfer the tape
from the scissors to the plane.
Once you get a really thin strip of tape cut,
you will need a way to transfer it.
Now, I'm using a creasing tool here, a folding tool.
These are widely available.
You can get them at hobby shops,
you get them all kinds of places on the web,
Amazon has them.
You'll want one that is made from something besides plastic.
Plastic is not great.
I think this is made from bone.
If you have an objection to bone,
just go ahead and get a plastic one.
But this is a really hard chunk.
Sometimes with the plastic ones
you'll get a groove going on one end or the other
if you bang it into a table or something,
it's just really easy to scar.
And that just transfers right to your plane.
And lastly you'll need a ruler
just to construct your tape gauge.
You can double-check the measurements on the strips of tape,
but that's really overkill. You don't need to do that.
So, tape, scissors, protractor, snack clip,
a gauge that you're gonna make using the ruler
and the pair of scissors.
You're gonna make a little gauge for yourself,
transferring tool, folding creasing tool,
and then you'll construct, of course, this two-angle gauge,
165 down here, 155 here.
That's gonna be used to set the dihedral angle.
So here we go.
Let's clear this out of the way.
I also, by the way,
just so I can allows me to see the tape better,
I have a fabric covered piece of cardboard here with,
this is just some cloth over...
It's black cloth that just helps me see the tape better
when I'm making cuts.
So let's get all of this out of the way.
Boom! Shazam, we've got all of it cleared.
I'm gonna zoom out just a little tiny bit here.
So, you can see this is A4 paper on the right,
it's taller than U.S. letter size on the left.
Again, this will allow A4 paper.
That's difficult to get in the United States,
but what you can do is take a piece of U.S. letter size
and cut a 19 millimeter strip off of one side.
And now you have the correct ratio.
And that's what we're gonna use today,
is a A4 ratio piece of paper
so that we don't have to run out and buy some A4 paper
which is really difficult to do in America.
If you're overseas, you're in luck,
you can get it everywhere.
In America, we got to make our own.
Okay, so I'm putting the tape dispenser
on this black piece right here
just so it's just easier for me to manipulate.
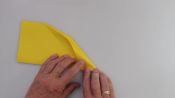
So, the first step here is gonna be folding the plane
and then we're gonna make the plane work really nicely
by putting little strips of tape on there.
So, step number one in folding the world record plane.
I'm just gonna move this tape out of the way for now,
just get that guy out of the way.
And we're gonna start by taking the...
Let's zoom in just a touch so we're all on that white there.
Take the top edge
and put it against the size of the big diagonal fold.
We're gonna make diagonal folds each direction.
My preferred method for diagonal fold is, of course,
to line up that corner and then swing the edges together.
And then I'm gonna sweep from the top to the bottom.
And every crease you're gonna see me make today
on this plane,
I am gonna really iron out with this folding tool,
so extra amount of time to use the folding tool,
but it's totally worth it.
Okay, now we're gonna take this corner
and bring it down into the crease.
You could practice your diagonal fold technique
by finding the corner carefully, and lining up the edges,
and sweeping from the top to the bottom.
Would be one good way to do it.
Now, you'll notice I'm creasing with my thumbnail
to really get the crease where I want it,
and then I'm bringing in the folding tool
and going over that thumbnail crease.
So I'm really putting an emphasis on really sharp creases,
not just kind of sharp creases.
It's not amateur hour here, we're getting serious.
So now we're gonna unfold that.
And the next move is to take this edge
and put it against the diagonal.
And we're gonna do that in a special way.
We're gonna give just a little bit of breathing room
between the edge of the paper and that diagonal crease.
And the reason we're gonna do that
is to allow the paper to really lay flat when it's folded.
And so, we're gonna give ourselves about a millimeter there
all the way up.
And this kind of makes this crease
a little bit difficult to make.
You're gonna do a one millimeter, then I show you.
I'm just gonna zoom in and show you this guy here.
Check focus.
Let me move it up even further here.
Can I focus there?
So when you see that line against the crease,
there's just a millimeter difference
between where the crease is
and where the edge of the paper is.
Can you see that?
Kind of, sorta, maybe right there.
Yeah, you can see the crease,
and there's just a little gap
between the edge of the paper and the crease.
And that's gonna allow the the layers of paper
to lay really super flat.
And that's a big trick
to making world record plane go the distance,
really, really thin wings.
Plane wings are always a must.
So in this case, we're gonna take this corner
over to the end of this crease, and we're gonna...
Let's unfold it and do it.
When I'm doing the world record plan,
you want symmetry on both sides.
So we're gonna move this layer over here now
and just give ourselves that same amount of gap,
about a millimeter top to bottom,
carefully put that into position before we make the crease.
In a second, I'm gonna show you a way to check
to make sure that you got
the same amount of gap on both sides.
It's really kind of subtle here.
Iron out that crease.
And I usually go ahead and flatten this part right here,
so it'll help it even hold together even more.
Now, this has not been opened and shut.
So I'm gonna open that up and then shut that,
and then fold this back over the top,
and then I'm gonna remake my creases nice and sharp here
all the way around
and flatten out this crease that's on top here.
And if you look really closely,
there's a little tiny square right here
where these layers meet, a little tiny square.
If you zoom way in,
you can see we've got a little tiny square right there,
let me hold it this way, maybe you can see it,
where the creases meet and the layer is just short.
Let's see if you can see it here,
let me hold it up to this camera
and see if you can see that little tiny square.
Yeah, there's a little tiny square right there
where those creases meet and the layers are just short.
There we go. You can kind of see it right there.
And so, if that's square,
then you've got the same amount of gap on both sides.
So if it's not square,
you might want to reconsider what you've got so far.
You might want to start over with your folding.
That little square right there
will tell you that the wings are gonna be more symmetrical
than they would be if it's not square, of course.
Okay, so, the next move is to fold straight down
across the middle of the X.
Pay attention that you're holding these layers flat here
as you move this down.
And the crease is gonna go
right through the center of the X.
And you're gonna know you hit the center of the X
when the top layer crease
lines up at the very bottom layer crease.
Whoa, what are we doing here?
Let's keep this guy going.
Let's go out here.
So, we're gonna fold across the center of the X here.
The next move is to fold across the center of the X.
You'll know you hit the center of the X
when the top layer crease
lines up with the bottom layer crease on both sides.
So take real care to line that up.
And the reason why you wanna take care of the line that up
is because you're gonna follow those two creases.
So if they're not perfectly lined up,
you're gonna create some error there.
Really sharp across there.
And now we're gonna follow those two creases as promised.
And I start by flexing this one and letting go
and flexing this one and letting go.
And the reason you wanna do that
is to keep equal strain on both sides.
If I were just to smash that over,
I would chase some layers over this way,
and then it would cause excess bubbling.
So if I chase some layers this way
and chase some layers this way,
and then bring them both down at the same time,
I keep the stress on the plane equal on both sides.
And now I'm ready to make the sitter crease on the plane.
And again, strategy for sitter crease on a plane.
I like to do it as late as possible.
This is the latest possible moment you can do it.
Let's flip it over, rotate the point to the left,
and I'm gonna fold this guy in half,
carefully watching how the rear corners lineup
and how the center lines up right at the nose,
and I'm just gonna line up these corners
very carefully here.
Sweep back, and then sweep forward.
And of course, really press that down hard there.
You're gonna just give the wings
a little ironing out there too.
Let's get this center crease ironed out
where all the layers are.
Everything is gonna be flat here.
Keeping everything nice and flat.
Okay, ready to make the wings.
We're gonna move the...
I don't know why I like doing this side first.
I'm gonna flip it over so the nose is pointed left.
I like that side first, I don't know why.
I just do that side first.
Okay, so, things to watch out for,
don't let this thing drift here,
don't let these layers drift here.
I usually use my thumbs to kind of hold that in place
as I start to roll it over.
Don't hit the nose, don't go right on the nose.
That'll probably happen that you won't
once you start trying to line up the tail.
But you'll see a triangle is starting to form back here.
You're gonna keep going all the way down
until that triangle disappears,
and that edge just touches that corner,
and sweep back, and then carefully sweep forward.
And it's a good thing that we left some space at the nose.
So there's a piece of tape
that's gonna wrap around the nose.
So that is good news there.
It doesn't have to be that big,
but you definitely want to leave a millimeter or two,
couple of millimeters on the nose.
Let's see how we did here.
That layer looks like it's staying together, so that's good.
We're gonna flip it over, and we're gonna do the other side.
And I'm gonna take care
that my crease starts at the nose here,
the same place that the other one does,
and then I'm gonna line up the rear corners very carefully
and line up the rear corners and sweep back,
just gingerly sweep back,
and then adjust the front of it as best I can
so it'll match there.
It's all about controlling layers here, okay?
So we've got really nice sharp folds go in there.
It looks like my rear corners came up pretty good.
Flip it over to make this wing crease nice and solid here.
This is our one chance to really make a nice wing crease.
I'm gonna go ahead and press the nose down
really solidly on both sides as well right here.
Good time to do that.
Now, we're gonna do a preliminary set of the dihedral angle,
and we're gonna use our gauge to do that.
The first thing we're gonna do is hold on to it right here,
flex the wings upward just a bit.
And when you're looking down the barrel here,
you can kind of see the layers change position
right about here where the layers end.
And so, the first time I made this
with really, really smooth paper,
I kind of noticed that that layer was changing there.
And that was the beginning of the idea
to get the dihedral angle, the variable dihedral angle.
So I'm flattening the nose just a little bit,
lifting this up in the middle just a little bit,
and now I'll just double-check.
I'm gonna use my 165 degree angle measurement
to look at the nose.
So it could go just a skosh more right at the nose.
That's really good.
It's majoring really well right there, 165.
And then I can use my 155
back here in the middle of the wings.
It looks like up, it's sitting in there perfectly.
Okay, so the wings are right at 155.
Let's just really make sure we're at 155.
We're gonna, of course, double-check and adjust at the end,
but it's easier, if you start this way accurately,
it's easier to get this guy done.
Okay, so at this point,
I'm gonna move in my black material with my tape.
We won't need the gauge again until much later.
Keep that guy handy.
Keep our tape gauge here.
We're gonna pull this guy out and we're gonna snip off,
with our scissors,
we're gonna snip off 30 millimeters worth of tape.
So, you're gonna measure 30 millimeters out.
[laughing]
The tape gauge.
Here we go. Get the gauge right at the end of the tape.
I'm gonna cut straight across at 30 millimeters.
Here we go.
And now I just spin this guy around
and I use the back corner of my tape dispenser
as my tape holding device.
I'm just gonna put that right there,
and we'll put our gauge aside for just a moment.
[indistinct]
Now you can kind of see the tape
over that white table there.
And that's looking pretty good.
I'm gonna move that around as I cut chunks off of it.
So you won't always have such a nice shot of the tape
dispenser in my piece there.
So the first piece of tape we're gonna do
is gonna cover this seam right here.
Basically, everywhere there's a seam,
can you see that seam on that side?
Can you see it on this side maybe?
Yeah. So, this seam right here,
that's the first one we're gonna do.
And we're gonna take a piece of tape that's about...
If you use the blades of the scissors,
there's about a one millimeter adjustment,
this guy is gonna be about...
Spin this around this way
so I can see that edge a little bit in here.
Here we go.
Can you see how much I'm taking there?
You're gonna take about a millimeter here
right off of that side.
Carefully just cut down parallel with that edge,
one millimeter.
And put the scissors aside for a moment.
I can attach that just to the very tip
of that exacto like that.
And that's gonna allow me
to easily put this guy in position here,
you can lay the plane on it's side for just a moment.
That's gonna go in.
I'm gonna use that millimeter.
I'm gonna split the tape in half.
At the same time I'm putting
a little bit on one side of that seam,
a little bit on the other side of the seam.
And then I'm rotating the plane and wrapping it around
so that it does the same thing on this side.
So I've just covered that seam
in a way that's gonna hold that shut.
And that is looking good.
And the next move I'm gonna do here,
I'm gonna cut a couple of pieces here
that are gonna go over this seam and around the nose.
So it's kind of tough to hold that together. Okay.
I'm gonna cut just a tiny bit wider,
just a skosh more than one millimeter,
that's a kind of a fat seam that I'm covering.
So you're gonna cut a little bit more.
Chasing the clip around
so that you're not covering the seam
is always a little bit of a challenge.
So now we're covering this seam right here.
And this is kind of a weird one
'cause you're kind of going...
The seam is more diagonal
but your tape is gonna end up going more vertical.
So you're kind of splitting across that diagonal there
and wrapping it around
and doing the same thing on that side.
It's not going parallel with the seam so much
as kind of across the seam in a diagonal fashion.
That'll help hold that one shut a bit.
Now, the next move we're gonna do here
is put a seam in the middle of the wings.
And this is gon be a straight up one millimeter cut.
And we're gonna cut this one in half.
I'm just gonna leave half of that on the scissors
for right now, and flip this guy over like this.
I'm gonna move my clip a little bit so I'm not in the way.
And we're gonna start...
This is where the point here comes in handy.
I'm gonna put that right on top of that seam here.
And I'm gonna put this out here at the 30 millimeter mark,
which is roughly the middle of the wing,
just right on that wing seam right there to hold that down.
Burnish that one down right now.
You can see I got rid of that bubbling right there.
Spin this around
so it's a little easier to do the other one.
Again, I'm gonna leave my gauge out here
so I can see my 30 millimeter mark there.
I'm gonna take this other half
of the strip that I just cut,
carefully transfer that to the exacto
and then carefully put this in at the same,
Whoops! Ooh. My tape deployed early.
So I'm gonna try to use the exacto to pick it up.
I didn't stick it down hard so maybe I can pick it up.
There we go.
I'm gonna reposition it on the exacto.
Whoa! Popped off, now it's on my tie.
[laughing]
This is definitely a non-cooperative piece of tape here.
[laughing]
All right. You're going down, buddy.
Right there. All right.
That is looking good.
The next thing we're gonna do
is put this seam of the tail together.
And this is a seriously difficult move here.
You're gonna use a one millimeter piece of tape.
And the trick here
is that you're gonna fold this tiny strip of tape
so that it goes on both sides of the tail.
So we're gonna start up at the top here
where the wings meet the tail.
And we're gonna try to position it
so we can just see half of that piece of tape.
Here we go.
And you're just gonna pull that up just a little bit.
There we go.
I got half of it on that side, half of it on that side.
I hope you can see that half on one side.
Let's see if I can get in close enough so you can see. Yeah.
So, you can see I've got half of that tape
on one side of that edge, half of it on the other.
I'm gonna hold this together,
I'm gonna wrap it around
so that goes all the way around on both sides.
This is really super hard to do.
I'm making it look much easier than it is,
but it is very, very difficult to get that to do that.
Let's get this.
So, you can see it's...
I've wrapped right around that.
So I'm gonna do the same thing,
I'm just gonna add one more piece below
so that tail all holds together nicely.
Again, one millimeter cut,
transfer it to the exacto,
lean this guy over.
See if are we in focus here. Not at all.
And there we've got...
You see it a little bit more clearly on this one, I hope.
And I've got...
You See that? Okay.
Get it.
It's tough to photograph here.
Okay, you can kind of see it, kind of see it there.
It's sticking out,
I've got half of it adhered to this side.
And I'm just gonna wrap it around.
So there's half of that strip on one side,
half of it on this side
It's a tough move.
That'll take you some practice to be able to do that.
It's very, very difficult,
but you need to do it to close up that tail.
Now that tail is one solid piece back there,
really nicely closed.
Okay, so, next trick is we're gonna put a piece
right across this part right here.
And that just takes a really small piece.
And so, we're gonna cut a piece to use for that.
And we're also gonna use it out toward the wing tips
to hold the rest of that wing layer down.
So, one millimeter strip,
I'm gonna start by just snipping off
maybe three millimeters or so.
So I got a lot of strip left there.
I'm gonna leave that hanging on the scissors.
I'm gonna transfer this tiny little strip here.
You can see how small that is.
It's that size.
And I'm just gonna put that
straight across this seam right here.
I'm gonna pinch that together, hold it together,
and use that to just lock together.
And my folding tool here,
I'm gonna just burnish that down.
Now, one of the big tricks
with getting this plan to go the distance is that,
these two layers, the right wing and the left wing,
have to meet the tail in such a way
that that's just one continuous sheet of paper.
So, this little piece of tape helps.
If you're a tiny bit off,
you can kind of cheat it flat a little bit here.
But this right here needs to be just one,
feel like one layer.
If you're feeling across there, you shouldn't feel a bump
as you move your finger across there at all.
It should just be one solid strip.
Okay, I'm gonna zoom back out here.
We're getting ready to now do this tape, leftover strip.
We're gonna put right out here at the wing tips.
So I'm gonna take this chunk
that we shaved a little bit off of,
a hair got stuck there,
and we're gonna cut it in half.
And half of it is gonna go on one wing here,
and half of it is gonna go on the other.
So let's make sure we're in focus here.
We're not anywhere near focus.
There we are. All right.
So, one strip is gonna go on this wing.
Positioning your tape on the exacto
is always a bit of a problem.
Your transfer is gonna happen at a different angle
than you want.
Okay, there we go, we're at that wing tip.
Burnish that down.
Let's do the other wing tip.
There are a lot of particulate matter in the air today,
I'm gonna get the sniffles here just a little bit.
I'm sniffling and snuffling my way through the plane here.
So you're always orienting the tape
so that it's parallel with the seam.
And you're just splitting at one side of the tape
on one side of the seam,
one side of the tape on the other side of the seam.
Now, we have a little bit of bubbling here.
And if we have any tape leftover at all,
we could use it to burnish that down.
Sometimes if I'm throwing in really variable humidity,
I'll put an extra piece there if I can muster it.
Okay, so this next piece we're gonna cut
is a double-wide piece.
And we're gonna cut two millimeters.
And it's gonna get cut into three chunks.
And the first chunk is gonna go right over the nose.
So we've got a double-wide two millimeter piece.
I'm just cutting almost what's a square there,
and I'm flipping this guy over,
I'm gonna move my clip back a little bit here.
And this one, I'm probably going to transfer...
Well, let's do it with the exacto just for fun here.
Let's put it on the exacto, that way.
I'm gonna wrap it right around the nose here.
Are we in focus?
I lifted it up, so we're not really in focus.
Let's get back on.
All right. So, you're gonna wrap this guy
right around there.
And then pinch the nose together as tightly as you can,
put it right across that seam
and wrap that around the nose like that.
The other two pieces,
we're gonna close up this gap right here.
And so, we're gonna take this piece that's left over here,
we're gonna chop in half.
And this one, I am gonna apply with my fingers
'cause I want to be able to hold this seam shut
as I'm putting it on there.
Are we in good focus there?
Kinda, sorta. All right.
Kind of close to the nose,
just in back of where the wings attach to the nose,
hold that shut, hold it really tight.
And then squeeze that around there.
I'm squeezing together with my thumbnails.
And I've really paid a nice tight chunk right there.
Okay, so, the next thing we need to do
is put that second half of the tape on,
and you can see it right there.
We're just gonna go halfway between the tape
that we put on there and this seam right here.
So, again, I'm gonna transfer it to my hand this time
and carefully put that right in there,
wrap it around, and really pinch it good.
Make sure that that seam is good right there.
So, it looks like we have...
I've been pretty judicious with my taping scheme here.
So, it looks like I'll have enough
to do the middle of the wings here.
So I'm gonna go ahead and do that, nice fat chunk here
for the middle of those wings to hold that down.
Now, it looks like I have a lot of tape left over here,
but you need a couple of really big strips
to go across the wings, or at the front across the wing.
I don't think that we have extra tape
in any way, shape or form.
[laughs] All right.
Right in the corner here
is where we're going with these guys.
No wonder I had a lot leftover.
I got a nice fat piece right there.
I'm covering that seam right there to the inside.
I might still have enough
to do that little bulge in the wings. We'll see.
I cut my millimeters pretty thin there.
So, what you're trying to do is cover this junction
between where the wing is meeting the body of the plane,
and then there's another layer right here.
So you're kind of bridging...
Let me show you this guy here.
You're bridging this tiny layer right here and right here.
So, the tape is in there
bridging this little corner right here.
So, it does take a fatter piece of tape to do that.
So push back out,
focus up right there.
Okay, I'm gonna go ahead
and try to do these little bubbles right here.
I don't have to cut a piece quite that fat.
So I'm going about a millimeter here.
There we go.
We're gonna come up pretty nicely
with our two strips across the front.
I'm gonna cut that in half, leave that behind.
It's gonna get a little bonus chunk in here
for this little bubble that's happening right here.
So we're just gonna cover that little bubble right there
about halfway between the two strips that are already there.
This is added, this is not strictly in the instructions.
This an added chunk, making four chunks per wing,
which is one more than I originally designed.
I originally designed for three.
This will help it go straight.
If you can work out,
so that you have enough tape to do this.
Your first time through,
you may have not even enough tape
to do the strips over the front.
It's really difficult,
it takes a lot of practice to cut your tape strips
that thinly and get them in place
so that you're happy with them. Okay.
We're gonna do another measurement here.
Before we put this,
we're gonna cut this strip into two pieces
and we're gonna put it right across here
to hold the front of the plane together.
But before we do that,
we're gonna do another quick measurement
using our gauge here
and just make sure that we're at 165 at the front
and 155 in the middle.
It looks pretty close.
Looks really close.
Okay, so that's good.
Our initial adjustment has held, so that is good news.
And so, I always pull the off of the tape dispenser
to make this cut.
This is a really hard cut.
It's your last cut on the tape.
And so, going across the front of the plane here,
what you wanna do is just far enough back
so that the whole strip is on the plane
and just hold that in position the best you can.
Press down in the middle,
really important to get it adhered all the way across there.
And then the next chunk is gonna go right behind it.
You're just gonna leave like two widths of tape
and put it right back there in a similar position,
try to line up the ends.
And this guy is really important
in holding the plane together
'cause the plane will crash
and the wings will want to separate
as the plane crashes into things.
And so, it's really important
to get that guy held together nicely.
Now, what you're gonna want to do
is go all the way around the plane
and burnish down all of the pieces of tape
all the way around.
So we've kind of started there.
If you can use the edge of the table,
let the wing drop off the edge of the table,
burnish the back of the plane,
burnish this same thing on this side.
Everywhere there's a piece of tape,
you wanna burnish it down. That's good.
Now, subtle adjusting.
You'll notice here that the wing is curbing just slightly...
From this wing tip to the back of the plane,
you want to just a really subtle curve here.
This is gonna be some of your up elevator
and you can get some up elevator by doing that
so that you don't have to add some back here.
And it's a really sneaky, subtle way
if you can get a little concave curve going like that
from that corner to that corner.
And then you're gonna have to add a little bit
of up elevator right back here.
But that's okay, that's normal.
You're gonna want a little bit right there.
But start out like that
with just a tiny, tiny bit of up elevator back there
and try this really subtle, just a slight bend right here.
That's gonna get you some up elevator
without causing a lot of drag.
And that's the whole taping scheme.
That's the world record plane.
Always start with a gentle throw
and work to a more energetic, more thrust kind of a throw.
So I want to do one other thing here.
I want to show you the difference between an A4 sheet
and the U.S. letter size sheet.
So there's a quite a bit of difference
in the size of the lifting surface area.
You can see that.
This plane happens to be the one
that went 236 feet, six inches,
and hit the other side of the hangar.
This was the first time we tried this,
really smooth A4 paper.
So I just thought you'd like to see
the difference in the size
of the plane you're gonna turn up with.
And this is a really...
This is a vintage, but it's one of my favorite planes.
The first time, on January 2nd, 2012,
the first time we hit the opposite wall of that hanger
that we broke the world record in on throw number one,
our first series of our throws right there.
I love that plane. It's all beat up kinda now.
You can scan to see it's all kind of ragged.
But yeah, it's now years old,
paper airplanes don't last that long.
Here is the world record plane.
You can see just that subtle rake
in the dihedral angle from here to here,
and that's gonna allow the air flow to change
as it goes and adheres further back
and it encounters higher dihedral angle
optimizing lift to drag over different speeds,
changing its own dihedral angle effectively
as the speed on the plane changes.
And you can see it almost disappears
when you look right down the barrel.
That's what you want.
Just really super thin wings.
Recrease everything, burnish down the tape,
and you've got a plane that'll go 150, 200 feet
even if it's made from just 26 pound paper.
This is 24 pound paper I used for demonstration.
You'll want 26 pound paper,
that's as close to 100 GSM as you can get in America
or 100 GSM A4.
The world record plane. [laughs]
Thanks for watching.
[upbeat music]
Starring: John Collins
Learn to Fold the World's Best Paper Airplane

Learn to Fold the 'Canard' Paper Airplane
Learn to Fold the 'Tube' Paper Airplane
Learn to Fold the 'Phoenix' Paper Airplane

Wow! Haha! Angry! Facebook Finally Has Emoji Reactions

App Pack | Meditation Apps to Help You Stay Sane

How This Guy Folds and Flies World Record Paper Airplanes

How Sleep Is Different in Space
How to Start a Fire With Your Bare Hands

How to Make Stone Tools